Quick Guide
We highly recommend you read this quick start up guide before adding your school. Here you will find all the information and instructions to create and manage your school under our Chinese vocabulary platform.
Please, click on one of steps of the following tabs.
A. Create School & Admin Profiles. Licensing.
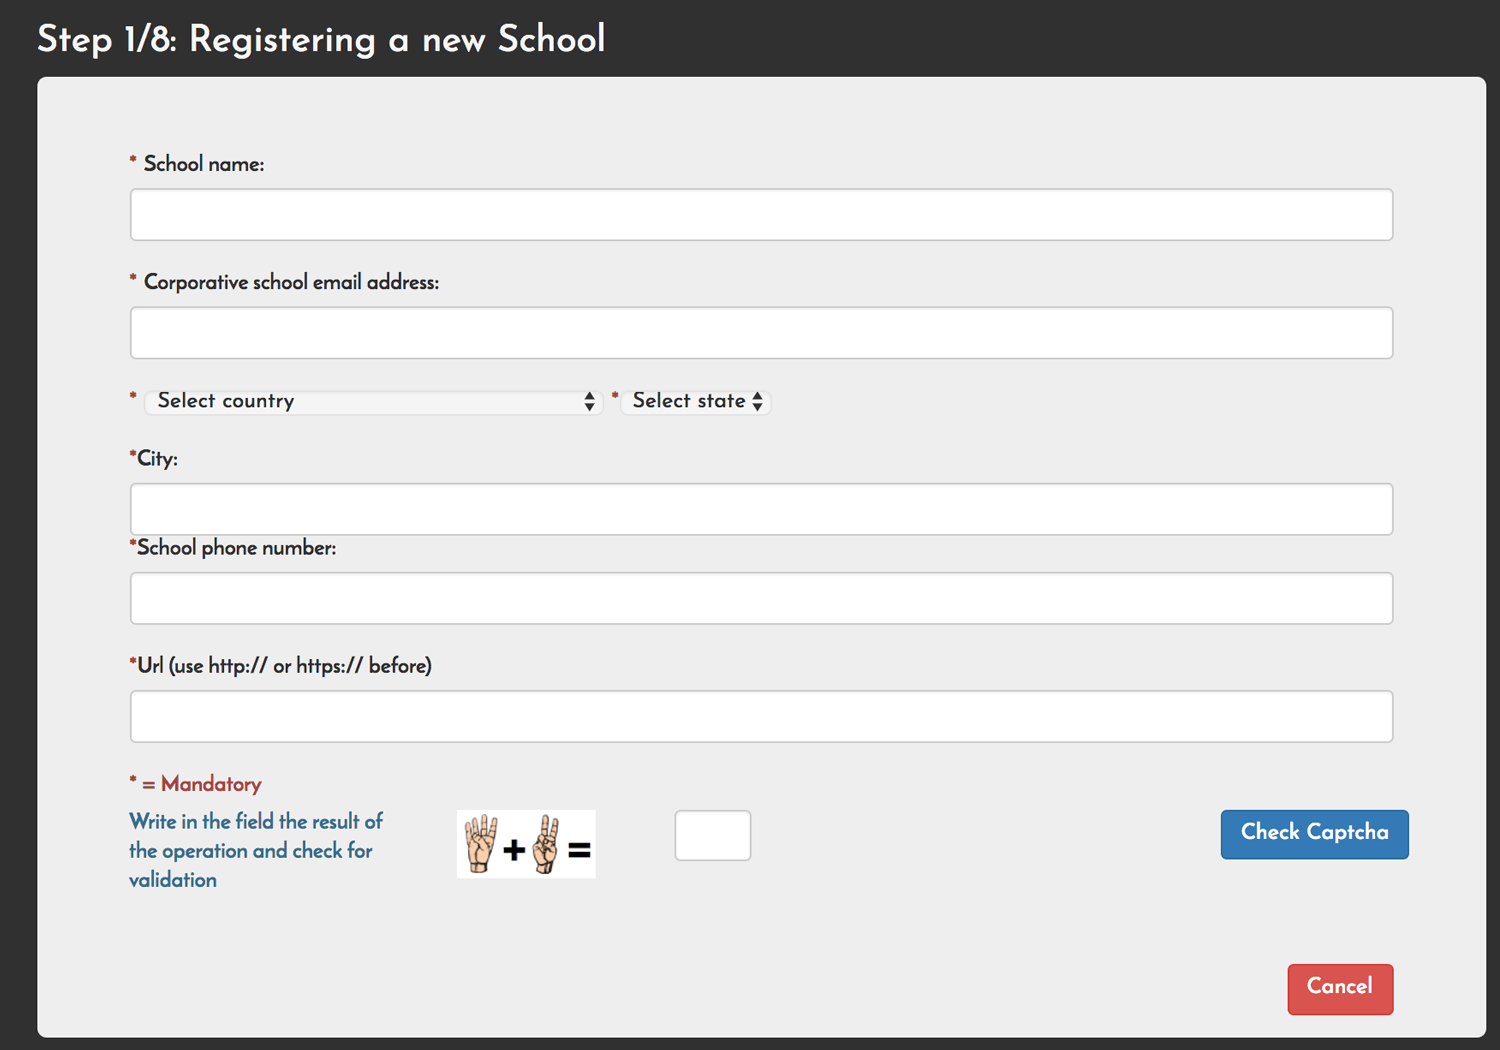
1Go to menu 'Schools/ Add your school' and fill the form with your School data (name, URL, contact email,...)
Keep in mind:
- 'Name' will be shown on the main page, rankings,...
- Your school URL must contain 'http://' or 'https://'.
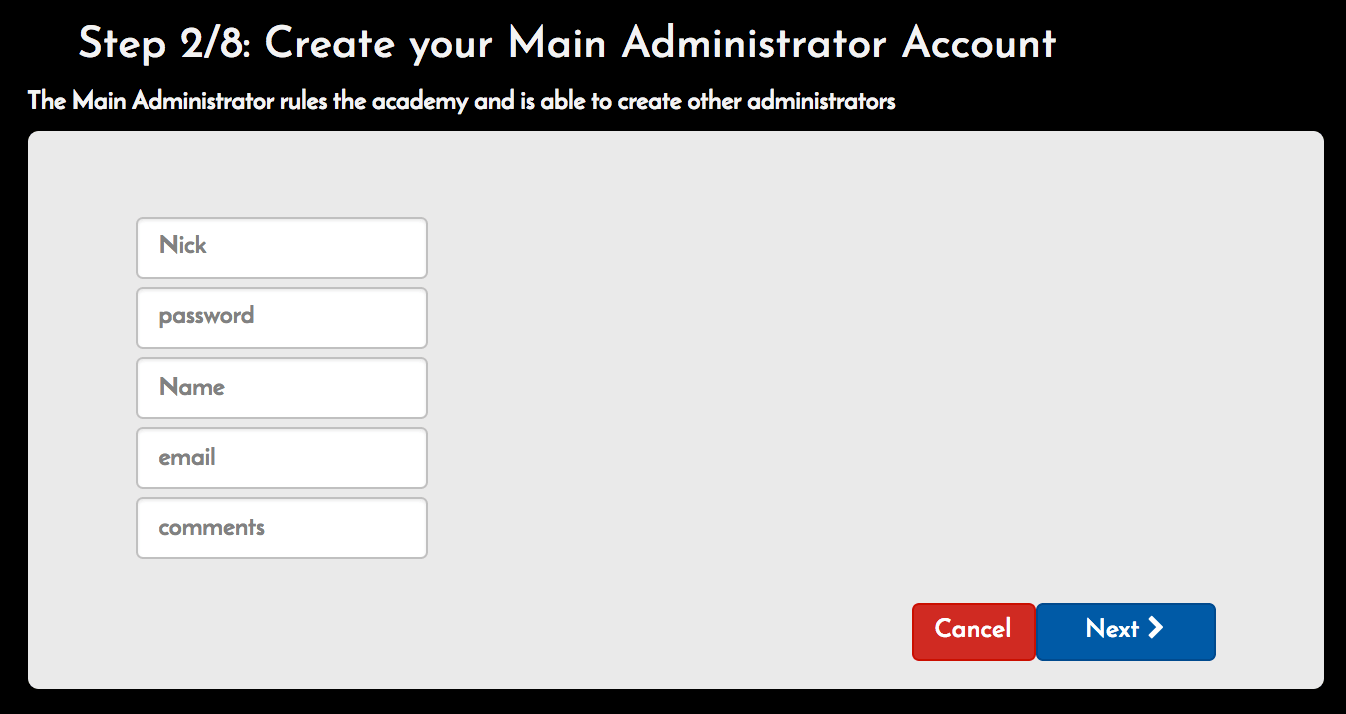
2Create the main Administrator account (name, email, password, ...). When you log with this account you are allowed to manage the school.
3Upload your School logo and banner to our server. Please, pay attention to these specifications:
| Logo | Banner | |
|---|---|---|
| Max size (pixels) | 250(width) x 140(height) | 640(width) x 200(height) |
| File format | JPG | JPG |
| Max file size | 300 Kbytes | 300 Kbytes |
IMPORTANT: Get these 2 files ready before adding your School in our system.
4Choose your account type according to the number of students you need.
5Proceed with payment to activate your school. You will be redirected to a Paypal (or credit/debit card) page. If you prefer to pay via Bank Transfer, contact us by email at this point.
B. Create more Administrators
Once your school is active, you can create more Administrator accounts. All administrators can:
- Add/remove more administrators.
- Edit and modify administrators' data.
- Add/remove teachers.
- Edit and modify teachers' data.
- Edit and modify school data.
- Renew a license (payment).
- Request a change of license type.
- Proceed with all teacher profile tasks.
If you need more administrators, follow these steps:
1 Log in as administrator.
2 Go to 'Admins' tab (you will see the main admin created on start) and click on 'New Admin'.
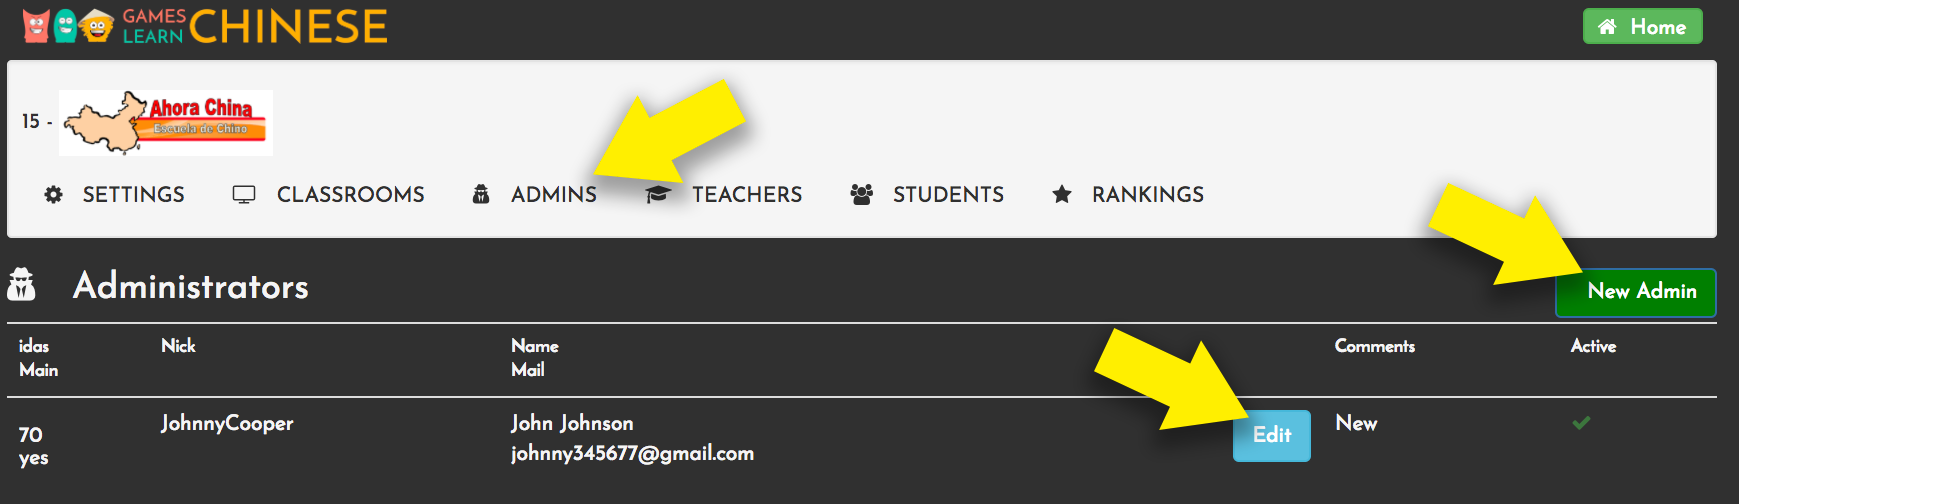
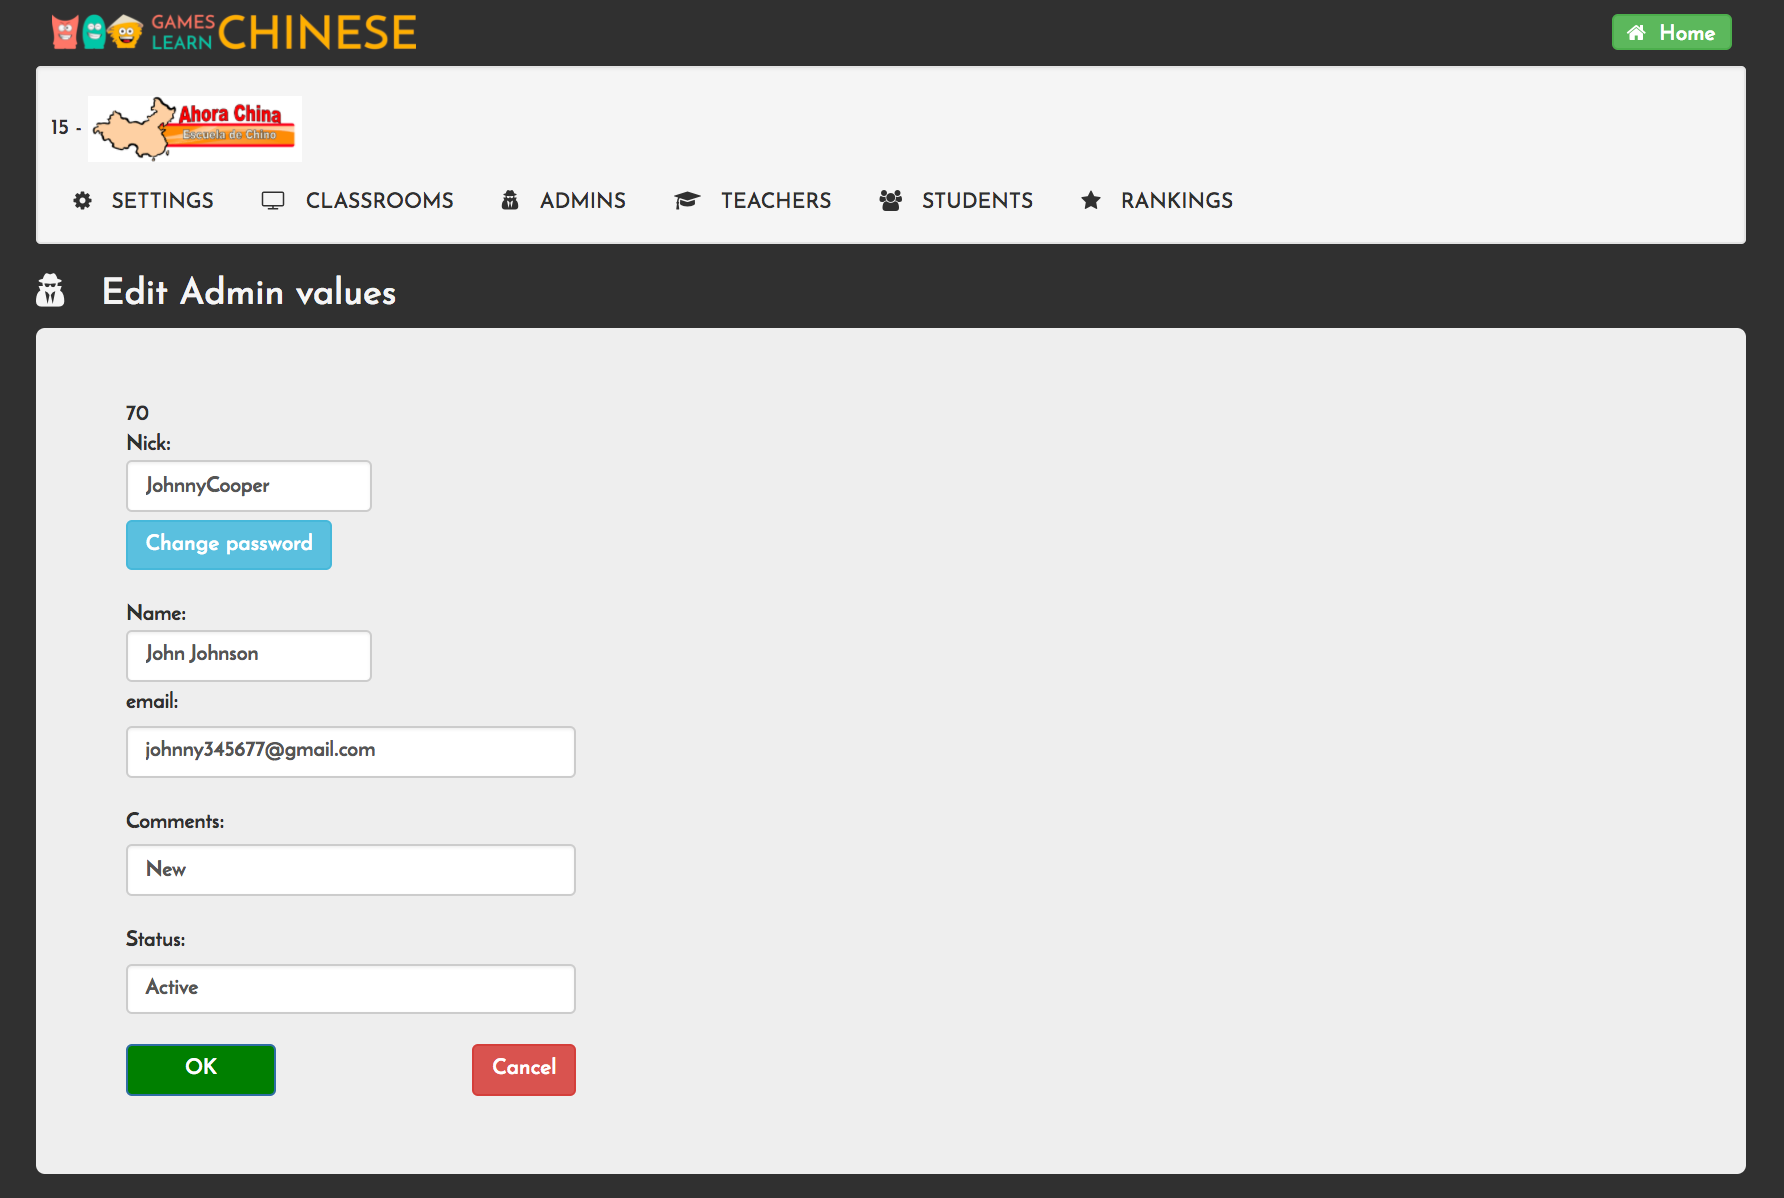
3 To modify an administrator profile, just click onEdit button.
C. Create Teachers
All teachers can:
- Create classrooms.
- Capture students.
- Assign students to classrooms.
- Move students between classrooms.
- Delete students from the school.
- View all students and classrooms statistics and progress.
- Send emails to students.
Follow these steps to create teachers:
1 Log in as administrator.
2 Go to 'Teachers' tab and click on 'NewTeacher'.
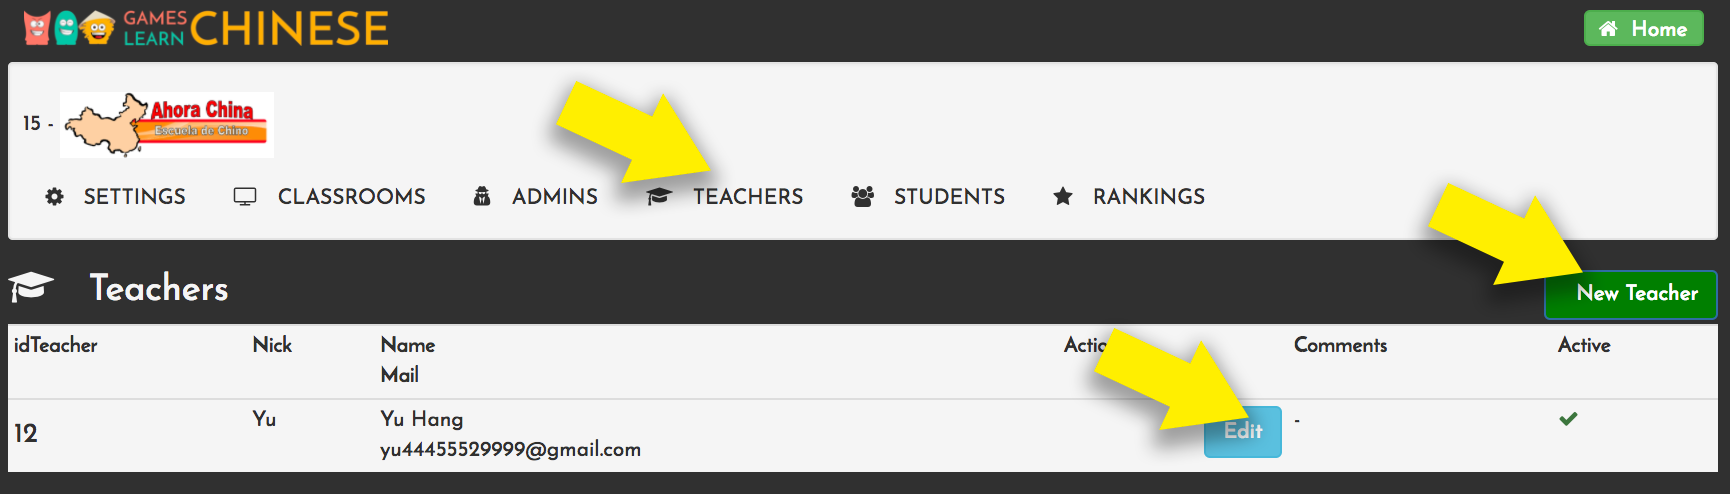
3 To modify a teacher profile, just click on Edit button.

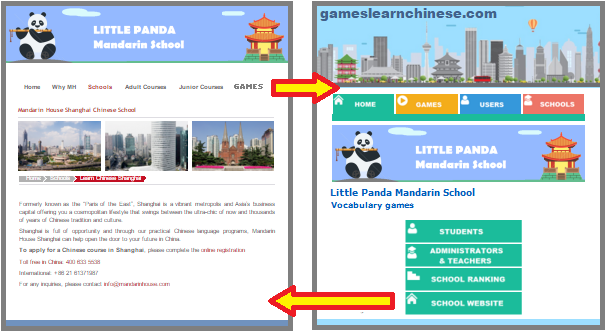
D. Add a link to your website
To make things easier to your students add a direct link to your customized platform for vocabulary in your website.
Ask to your webmaster to add this link. (e.g. http://www.gameslearnchinese.com/index.php?school_id=22, where 22 is the ID of this sample school).
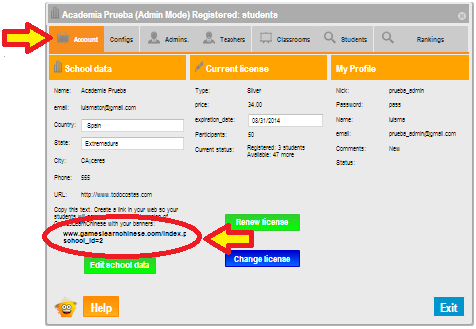
You can find your link code (and school ID) under Account tab.
E. Capture Students
You can capture registered users in your school. That means your students must have an account on our system before capturing them in your school.
(Remember that there are also unregistered students with limited access. Those ones can not be captured).In the following image you will see how your students can create their accounts:

All your (captured) students will enjoy a premium account. That means:
- Access to all games.
- Access to extra content.
- Personal statistics available.
- Change their belt color.
- No ADs.
- View their school and classroom rankings.
There are 2 methods to capture (add) students to your school:
Method 1: Direct capture
To capture a student you need the User name and Email he used to create his account.
Follow these steps to capture students:
1 Log in as administrator.
2 Go to Students tab and click on Add Student.
3 Search the student by User name and Email and click on Save.
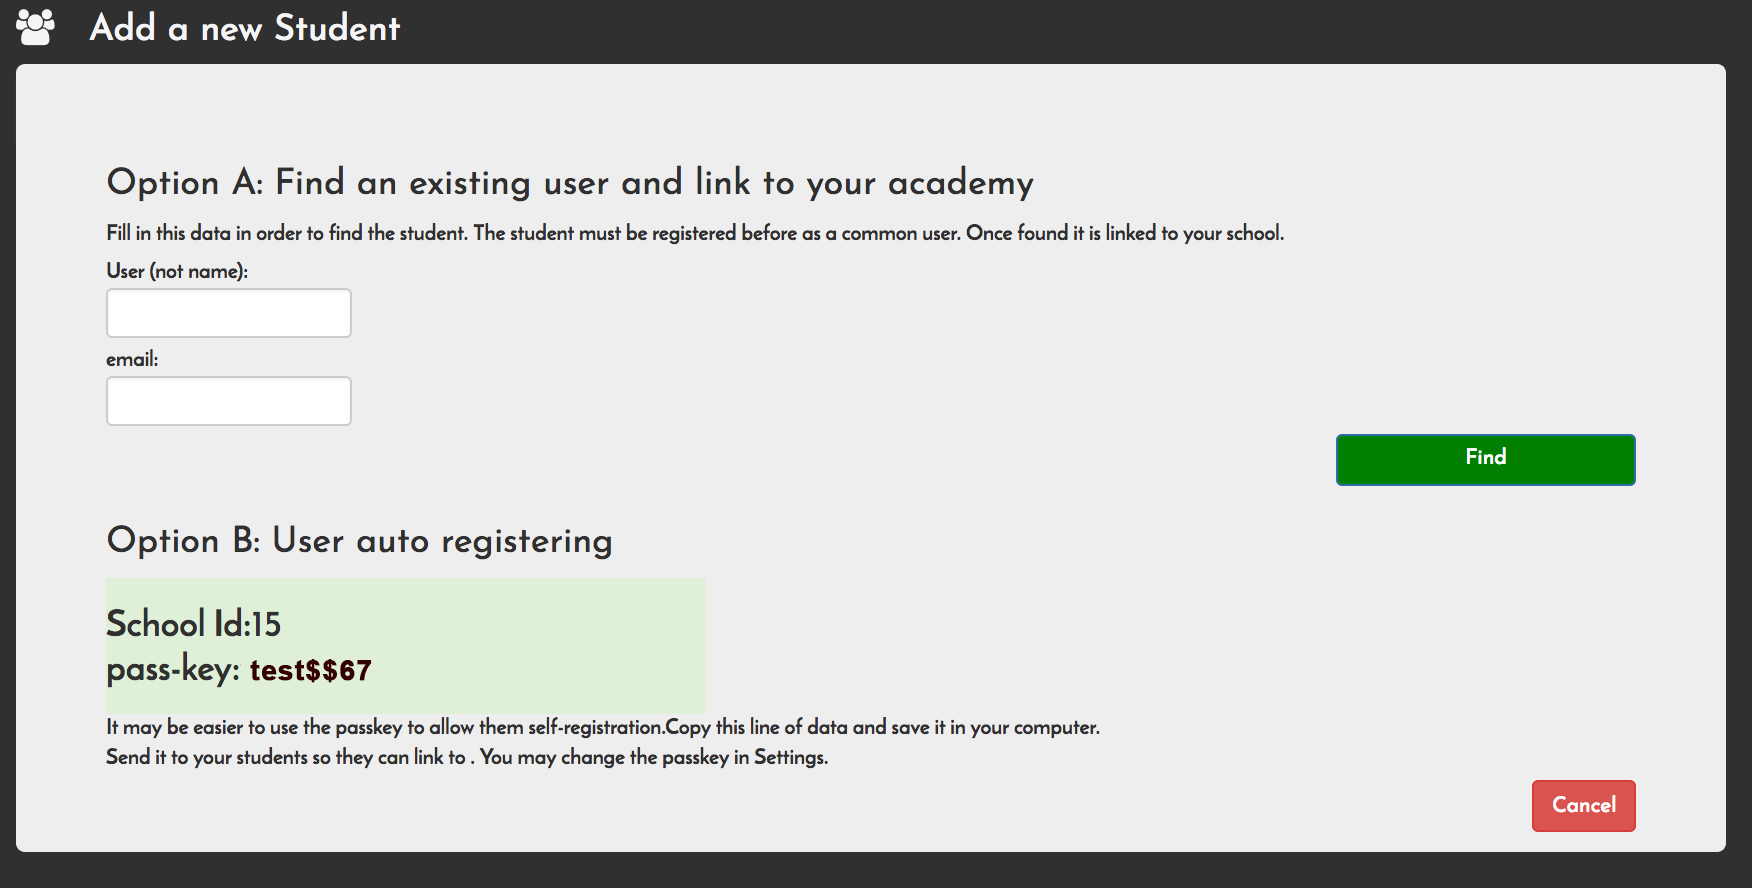
Method 2: Students join directly
In the case you have a lot of students to capture, there is an alternative to make things easier to administrators-teachers.
Students can join directly to an school if they know the School ID and the required pass-key.
Follow these steps to proceed with this method:
1 Log in as administrator.
2 You may proceed as before (going to Students and click on Add student). But if you want to setup the passkey go previously to 'Settings' tab.
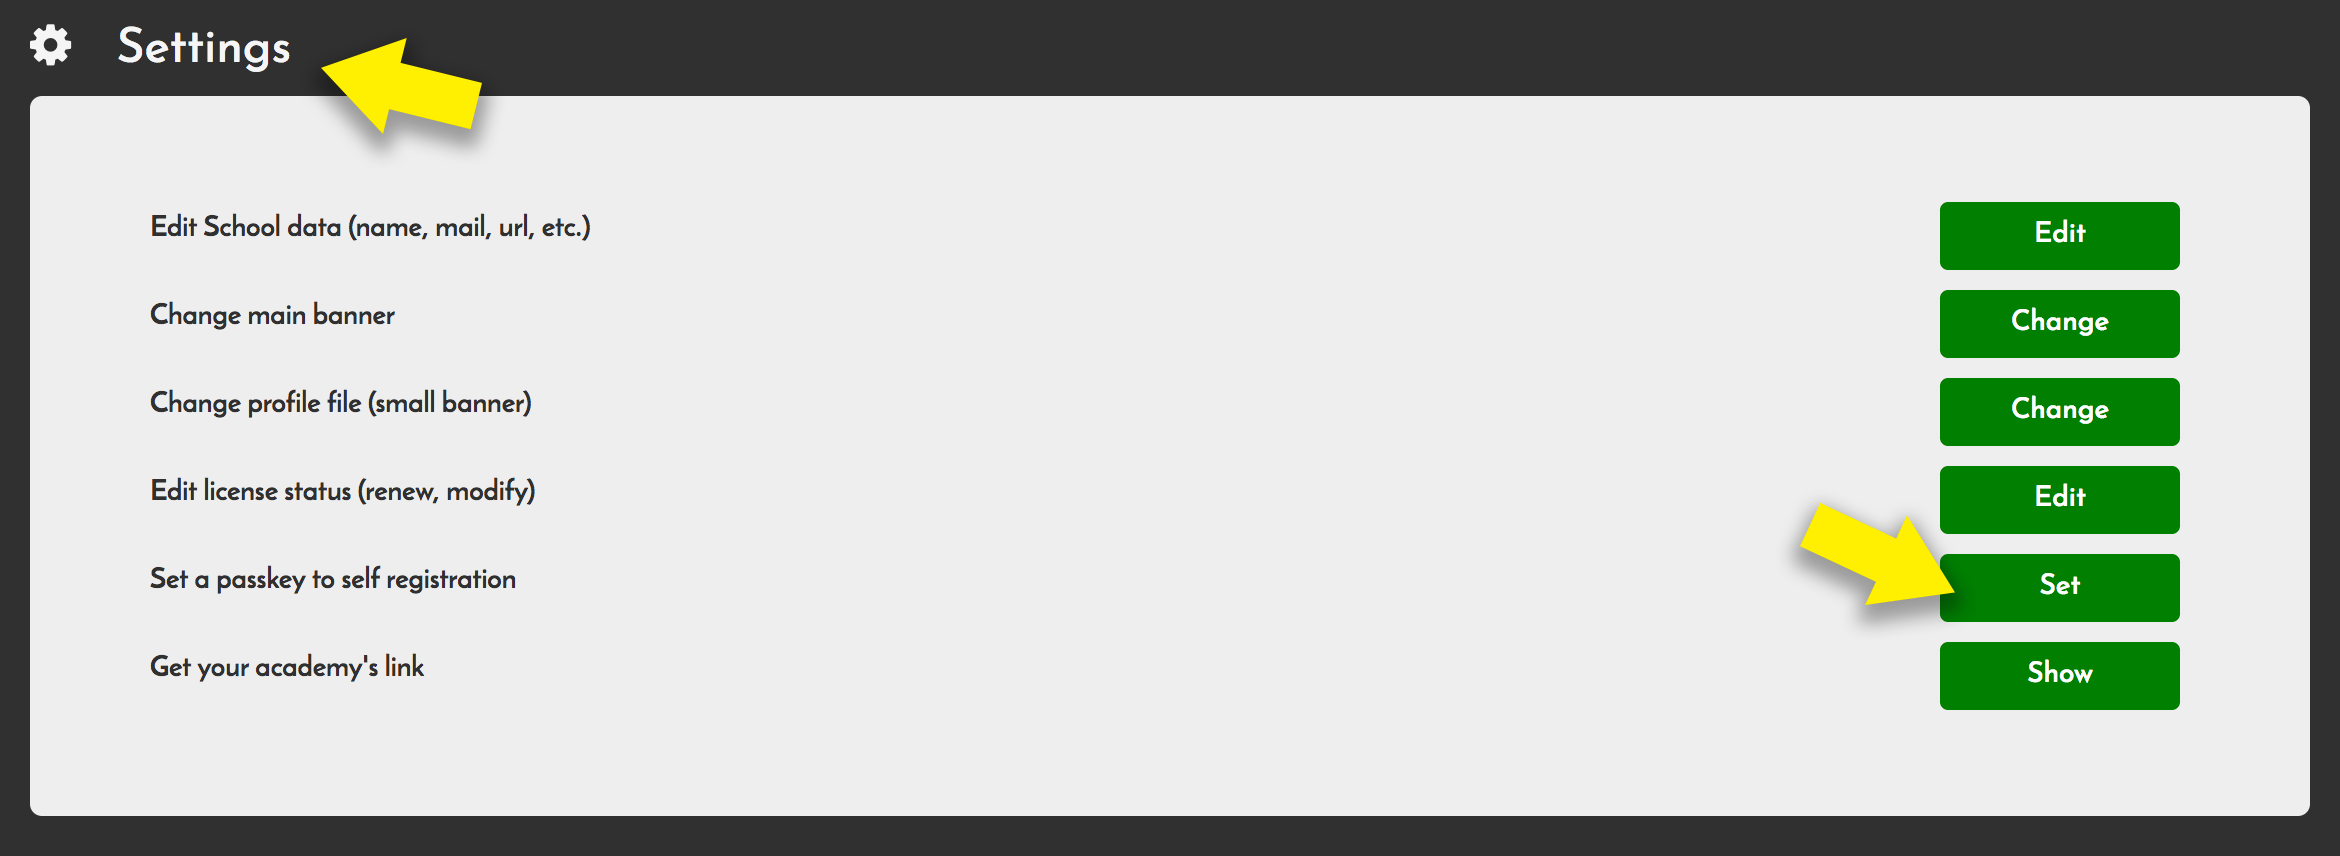
3 Select Set a passkey for self registration set button.

4The School Id is generated automatically. Type a secure pass-key (e.g. 'my-pa$$-key'). There is only a passkey for school. If you change it does not affect to former students, but next ones will need the new passkey.
5 The main administrator can receive an e-mail each time an student is added to the school by selecting Do you want to be informed each time a student is registered? option.
6 Activate (or desactivate) this method under Do you want to activate this system now? option.
7 Send this data (School ID and PassKey) to your students. Those codes may be sent to many students (not an individual code but a school one).
8To join, each student must Log in.
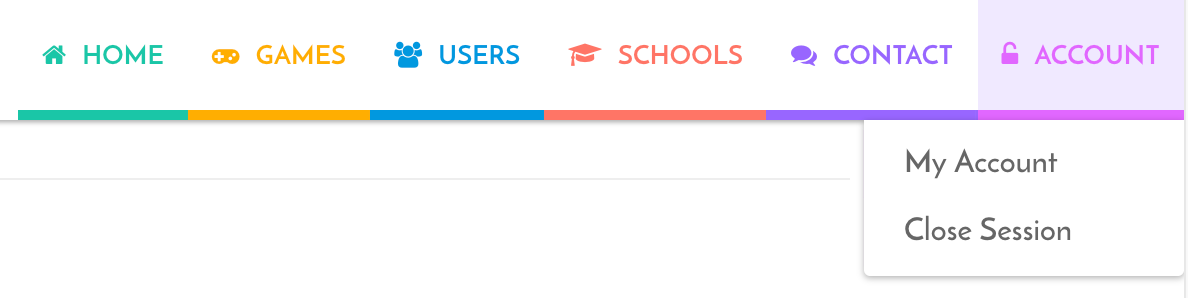
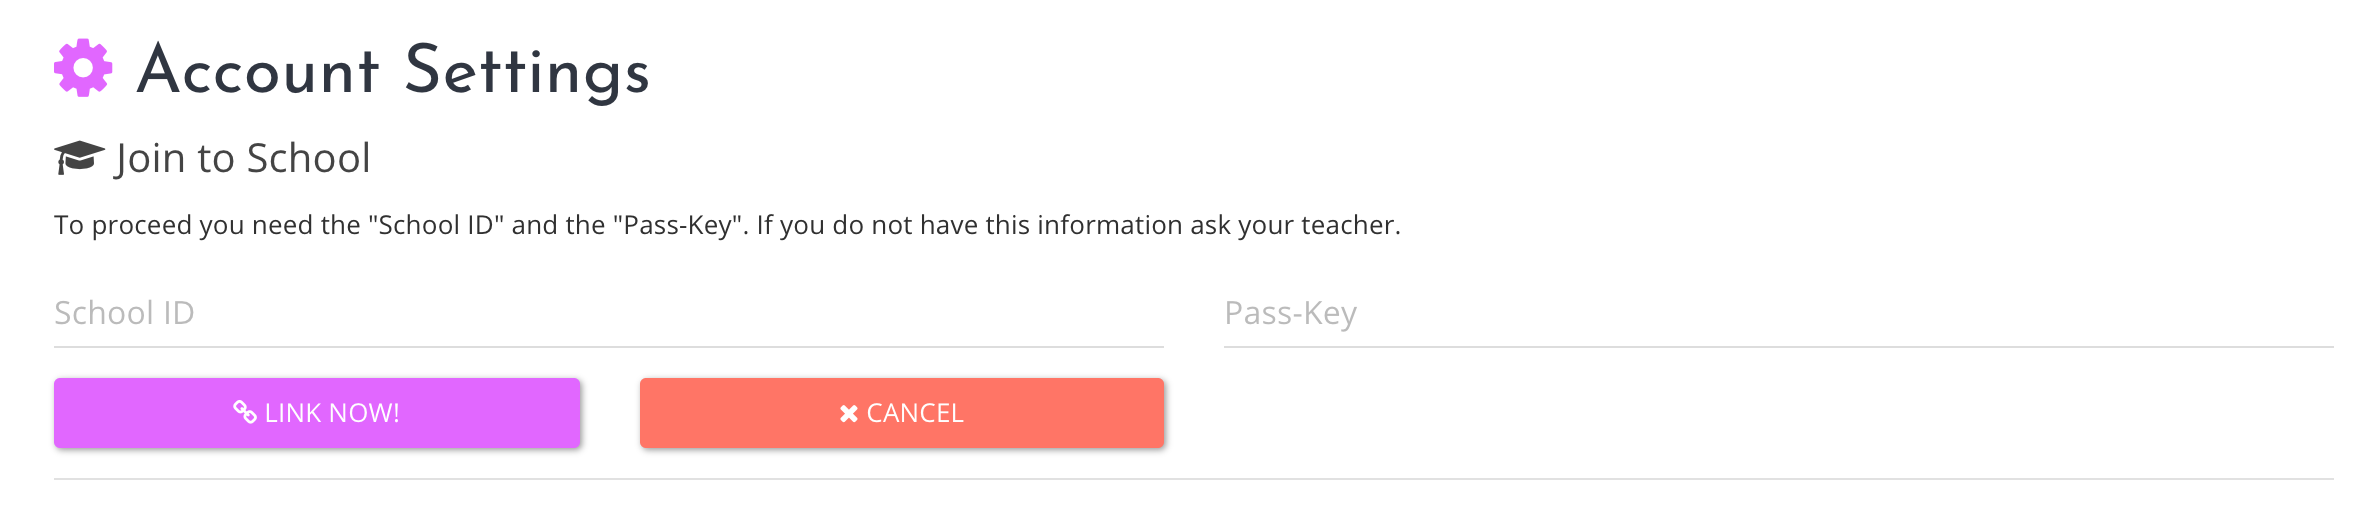
9 Then click on Join to School button under Account Settings by using your School ID and Pass-key.
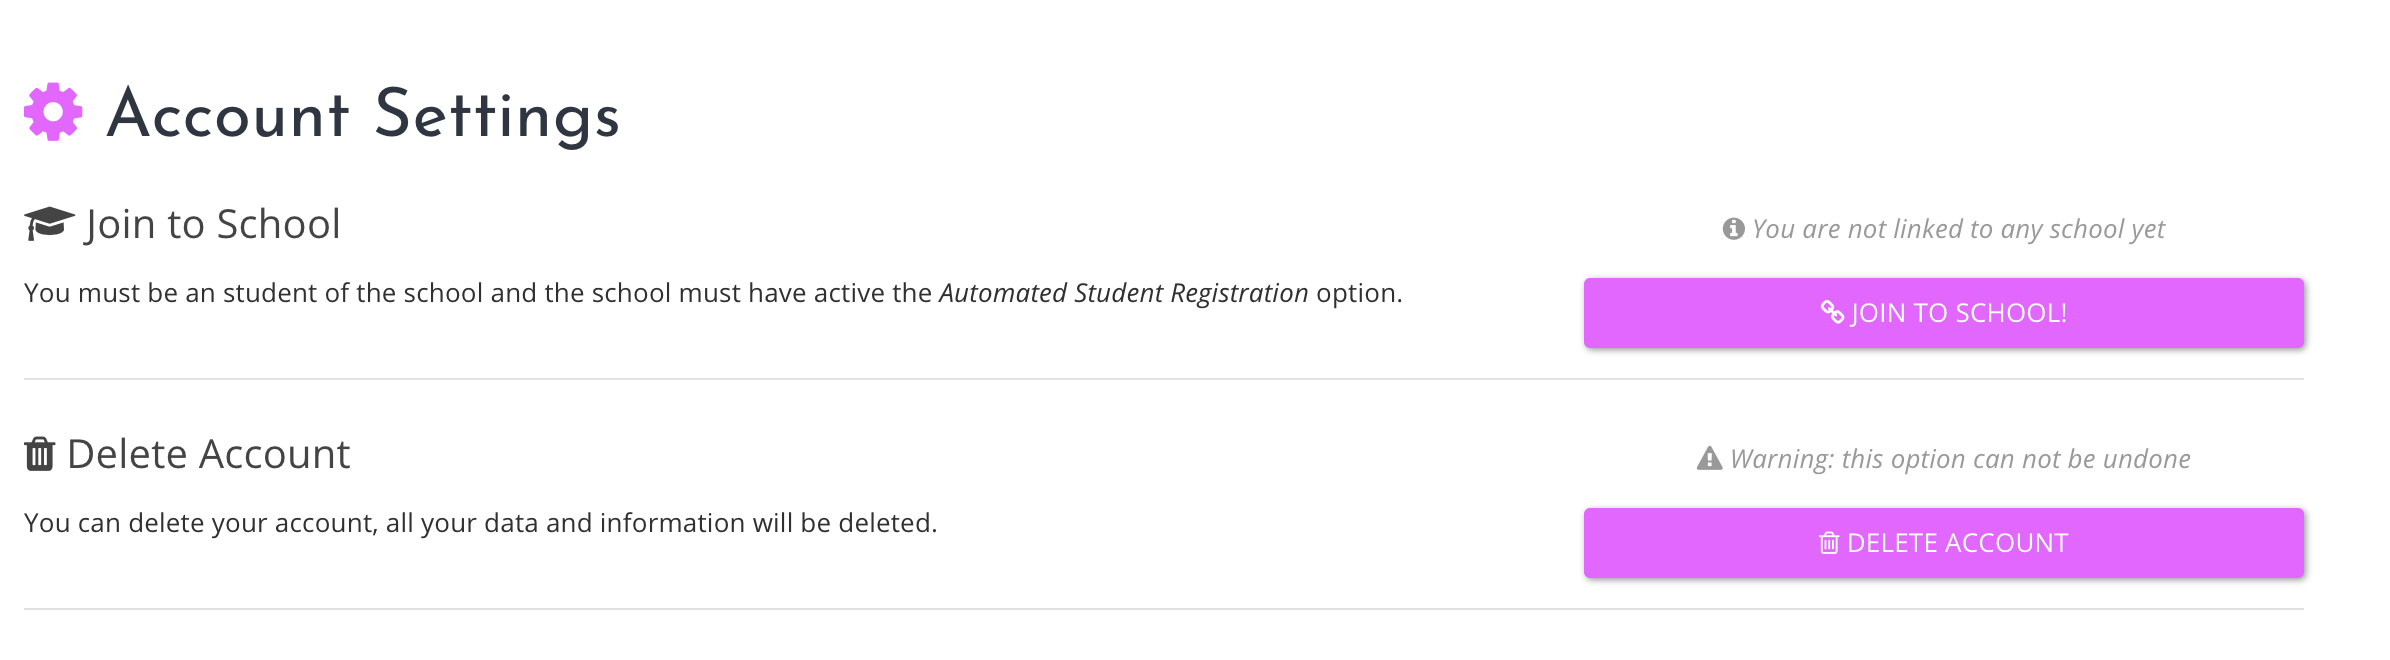
10 And finally enter the School ID and Pass-key.
IMPORTANT: To play games you need a student account (administrators and teachers are not consider as users, they need a student account and they can be grouped under a classroom named 'Teachers').
F. Create Classrooms
Now is time to group captured students by classrooms. Proceed as follows:
1 Log in as administrator or teacher.
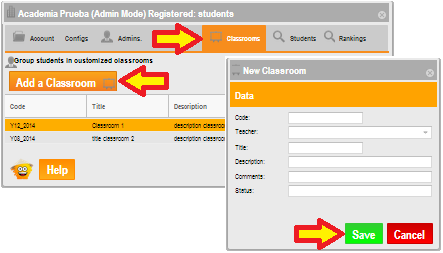
2 Go to 'Classrooms' tab and click on 'Add a Classroom'.
3 Fill data and 'Save' the classroom.
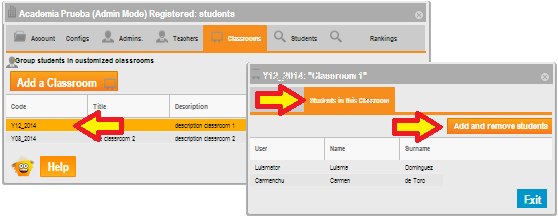
4 To modify a classroom data, just double click on it.

5 To add students to a classroom just edit the classroom (double click), select 'Students in this classroom' tab and then click on 'Add and remove students' button.
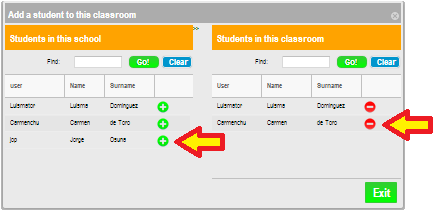
6 From the table 'Students in this school' select the desired student and then press 'plus' icon to add him to the current classroom.
7 To remove a student from a classroom, select him fro the table 'Students in this classroom' and then press 'minus' icon.
IMPORTANT: One student cannot be added to more than one classroom.
G. Monitor Students
IMPORTANT: Students must belong to a classroom to be monitorized.
Monitor a classroom and a student.
Let's see with an example how to monitor a classroom for these parameters:
- Game HSK 2.3 .
- Classroom 'Y08_2014' .
- Order results by Pinyin hits.
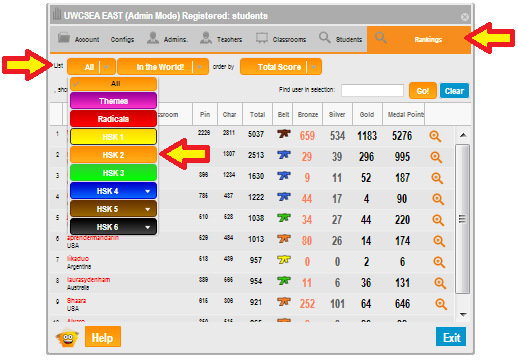
1 Log in as administrator or teacher.
2 Go to 'Rankings' tab and select 'HSK 2' from the games family list.
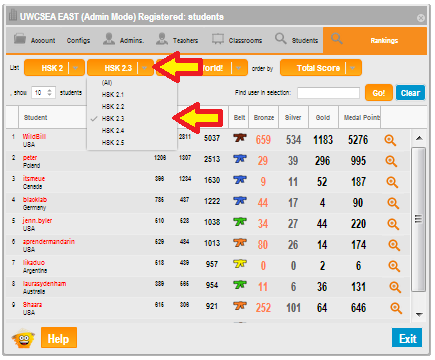
3 Select 'HSK 2.3' from the games subfamily list.
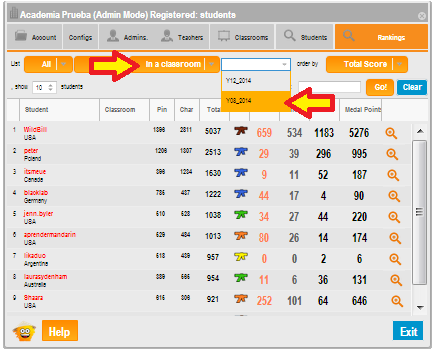
4 In the area list select 'In a classroom', and then chose classroom 'Y08_2014' from the new list.
5 Select 'Pinyin Hits' under 'Order by' list.
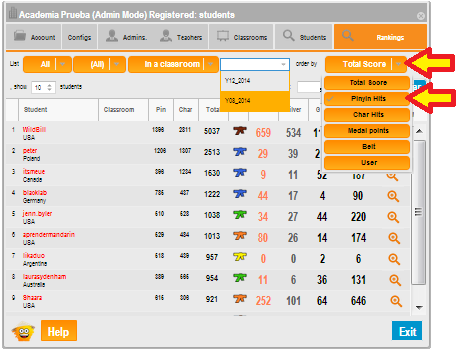
6 Now you can see the result for 'Y08_2014' classroom, game HSK2.3 ordered by pinyin hits.
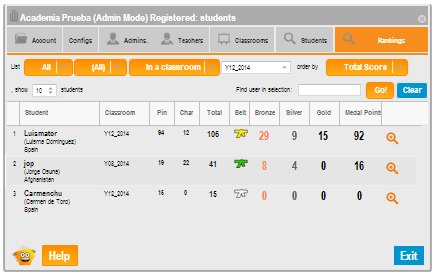
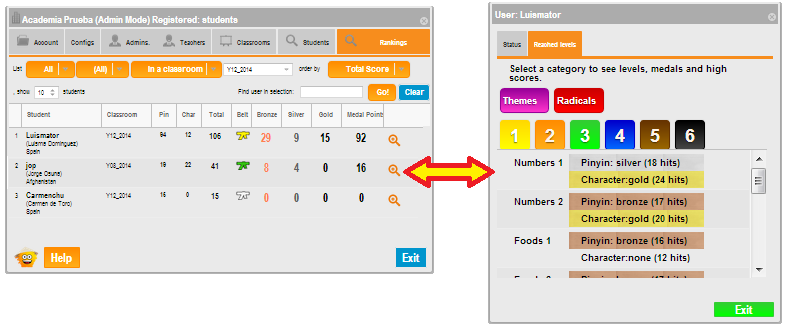
7 You can see the scores of an individual student by clicking on magnifier icon.
More options.
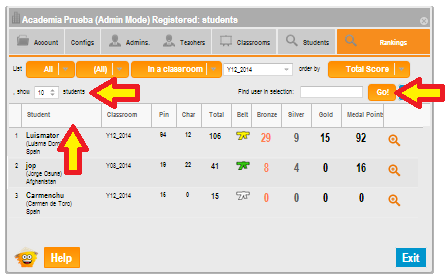
1 You can select how many students can be shown on screen under 'Show' option.
2 You can search a single student in the result list under 'Find user in selection'.
3 You can order your result list by clicking on the row title ('Student', 'Classroom', 'Pin',...).
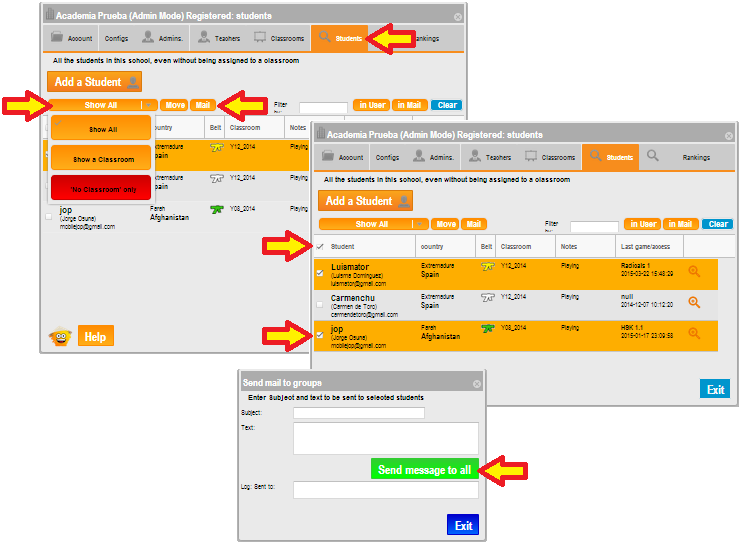
Send messages to students.
You can send a message (email) to an individual student or a group of them (classroom, school,...). Follow these steps to proceed:
- 1 Go to 'Students' tab.
- 2 Select a group of students (the whole school, a classroom, students without classroom) and click on 'Mail' button.
- 3 Now select the students of this group by clicking on the squared selection box (you can select/deselect all of then by clicking on 'Students' box).
- 4 Type de Subject and Content of your message and then press on 'Send message to all'.